Saturday, February 26, 2011

Heavy Gear - Training Sortie Delta

Sgt. Jackson eased his Jaguar out of the Orca's bay and onto to the solid ground of the Zagreb Plains. The rest of his recon squad deployed and braced themselves as the aerial transport lifted off, causing strong gusts of wind that rattled the internals of their Gears and flattened the grass all around them. Jackson ordered his squad to check their equipment one last time before heading further west on their mission.

Central Command had learned that the Colonial Earth Forces had returned with greater intelligence. Word had been that they now employed commando tactics including the use of the North's own weapons and tactics against them. What better way to train than to having the North train against themselves the brass had decreed. "I think it's such a stupid idea" Jackson muttered to himself. The one silver lining to this training is that he had served under the Commanding Officer of the opposing force before, and while they were using non-lethal ammunition, he wouldn't think twice of getting up close and socking the commander with a nice left hook from his gear. "Brothers-in-arms will be brothers-in-arms," he joked to himself before throttling up his secondary movement system to engage his opponents.

Regular opponent Jay and I had another 750 TV battle over the weekend. Now the lead-up to this was that Jay was to bring his newly minted Peace River army, but regular life unfortunately got in the way. He tells me he's on the road for the next few weeks, so many hours spent in hotels should result in that finished army he (and I) eagerly want to play. Instead he brought his Northern army for what result in some incestuous carnage. As well, this was also our first time playing with the new Gear Up field testing rules as well.

Jay's Northern Guard force consisted of a General Purpose (GP) Squad, a Fire Support (FS) Squad, and an Infantry Platoon. My UMFA force consisted of a GP Squad with the Tigers and Sabretooths, a Recon Squad with a Weasel, SD Hunter and two Bobcats, an Infantry Platoon, one section being in freshly painted Antelope ORVs, and a single Field Gun. My objectives were to Recon his GP Squad and Breakthrough to his deployment zone; Jay's objectives were to Recon my Recon Squad and Wipe Them Out for my GP Squad. Here's a good shot of our forces set-up.

Elements of my GP Squad and a squad of Infantry in ORVs begin to move down Jay's left flank.

Another shot of my army from the opposite side of the board.

My forces on the right flank advance on Jay's GP Squad. Just out of the picture at the end of the road sits my ORV squad, who went top speed to contest my Breakthrough objective in my first activation of the first turn of the game!

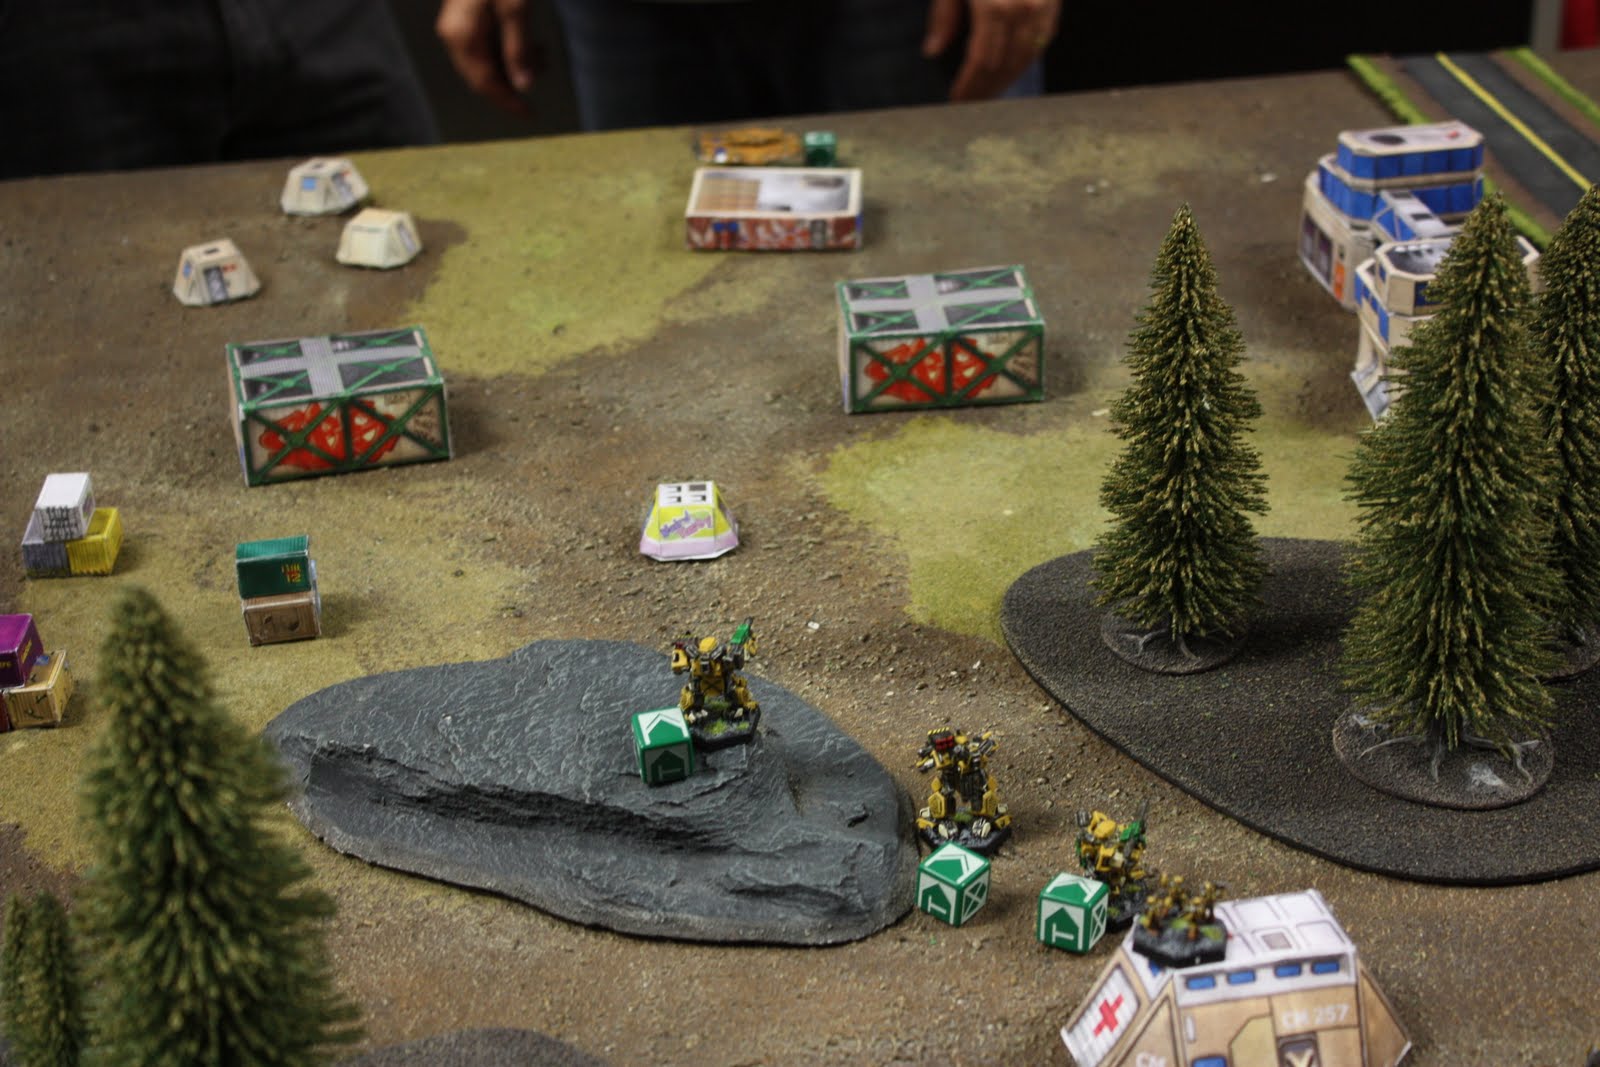
On my left flank, My Recon Squad calls in targets for my Field Gun to rain fire down upon while my other squad of ORVs harrasses elements of Jay's FS Squad.

Elements of my GP Squad hold a choke point between two buildings after dipsatching Jay's Army Commander. Unfazed by this loss, Jay's troops continue to attempt to obtain their Wipe Them Out objective on my GP Squad.

My GP Squad holding down the buildings from the opposite vantage point.

On my left flank, the majority of Jay's forces have been overcome, and I press forward to complete my Breakthrough objective with elements of my Recon Squad.

On the right flank, a single Hunter is all the remains of Jay's forces; my Breakthrough objective will soon be in my grasp.

Jay's Gears are totally overcome, leaving his infantry ti be the only opposition left. They did manage to pling a box of damage on one of my SD Hunters though with basic assault rifles!

So after all was said and done Jay had achieved 2 VP to my 3 VP. Not a bad result at all for Jay considering he was Gearless by the end of the game. Besides that here's a couple of observations I had:

  1. Flies in the Ointment: I was more than impressed with a section of Infantry in ORVs. None of them managed to finish the game alive, however, their rapid speed (especially on roads) combined with the Anti-Gear rocket launchers they were equipped with meant they a threat Jay could not ignore. Since I had them contest an Objective early in the game, Jay tied his Grizzlies up with fighting them, meaning I did not have to deal with MRP barrages on my Gears instead.

  2. Everything Old is New: After playing with the new GearUp rules, I don't think I'll go back to the old set. The range bands are awesome, making such basic weapons as Light Autocannons and Anti-Gear Rifles viable once again. The new Maneuver rules means that I actually use Gears in walker modes, and the new overkill rules means Hunters become the steady workhorses they are supposed to be. My favourite part of using the new rules was when I was able to have a Hunter go Stationary and use it's ROF on it's LAC to walk fire between two enemy Hunters, dropping one to Heavy Damage and Overkilling another, all from 12" away!

Tuesday, February 8, 2011

Heavy Gear - One Less Footslogger Pt. 1

I haven't been inspired to paint much. Between some serious family tragedy, the holidays, and a move, I haven't had the time or urge to put paint to anything. However, time has passed and I've gotten back in the swing of things. One thing I've really wanted to to with my Heavy Gear army is get my infantry much more involved in the battle. Typically they bunker up in a building in my deployment zone and take reactionary and opportunistic shots with the odd anti-gear rifle or mortar here and there. While being annoying to my opponent, I think they can do better. So stick'em in a jeep and lets let'em loose! I've heard that the combo of the ORV and the rocket launcher can cause great headaches, and I'm looking forward to trying it out. Here is my first squad of ORV infantry, and I'm currently working on getting a second squad mechanized as well:


I forgot to add my dog ate the far left Antelope, so his wheel is a bit off and he has a nice bitemark in the windshield. Ah, the joys of pet ownership. Until next time!

Monday, January 3, 2011

Heavy Gear - Incident at Checkpoint Ypsilon

Lt. Stone wiped the sweat from his brow before taking another gaze at the horizon with his binoculars. The hot rays of Helios hitting him were only slightly less uncomfortable than the stale air in his Sabretooth's cockpit, and the open canopy gave him a chance to smoke. What him and his men were really doing out here in WFP territory, where the Barrington Basin met the Great Western Plain, was anybodys guess. Word had simply come down from the brass that they were to advance on this small settlement, simply coded "Checkpoint Ypsilon" in the briefing to engage dissidents. Furthermore, the briefing had been delivered by a Northern Guard Intelligence Service officer, so it had to be something serious.

Stone's comm began chirping with information being downloaded, and he quickly scanned the information. "Dissidents" he found out, were CNCS units looking to desert and form their own fiefdom in the badlands, but not before destroying essential infrastructure on the way. While a UMF man himself, and his unit dedicated to the Northern Guard, he could not forgive their traitorous ways to Northern ideals. Something on the horizon caught his attention, and he quickly looked through his binoculars again. Dust trails, and Gears creating them on their way inbound. He quickly brought down the canopy and sealed the cockpit. "Alright boys, lets hit them where it hurts" he sent out to his troops on the general comm channel. He checked his autocannon's ammo clip one last time, and engaged his secondary movement system to intercept the hostiles...

So let's kick off 2011 with another battle report! In a rematch of sorts against regular opponent Jay, we've got some North on North action in a 700 TV point battle. My PL 2 NorGuard force consisted of a GP Squad with UMF Tiger and Sabretooth upgrades, an Infantry Platoon and a FS Squad. Jay also had a PL 2 force that consisted of 2 GP Squads and a FS Squad. My Objectives consisted of Breakthrough and Recon of one of his GP Squad. Jay's Objectives of Seize and Wipe Them Out on my GP Squad.

Here's a shot of both of our forces. Jay had chosen to spread his forces out along his battle line while I chose to make a heavy push up my left flank:

A closer look at my left flank. My goal was to overwhelm him on this side, and thus achieve my Breakthrough objective:

My Infantry Platoon and elements of my FS Squad stand guard on my right flank. One of my infantry squads bunkers in on Jay's Seize objective in the warehouse:

A "Gears Eye View" of what my GP Squad and Infantry are up against on the left flank:

Elements of my GP Squad and FS Squad attack their opponents from atop a ridge (and my CP counter cowers behind a rocky outcropping):

My GP Squad begin mopping up the remainder of Jay's GP Squad and FS Squad:

A good shot of the fight mid-battle. Things are beginning to turn in my favour on the left flank, as Jay has few remaining units to stop me from achieving my Breakthrough objective:

Meanwhile, on the right flank, Jay has fresh Gears ready to Seize is objective, with little of my forces between the two:

My Infantry Platoon bunkers up in the buildings around Jay's Seize objective, while raining field mortars (much to their futility) on enemy units:

Jay brings reinforcement to my left flank, but they prove no match for my GP Squad:

Jay's last ditch effort on his objective results in the total destruction of his forces on my right flank:

A well-placed rocket from the remaining infantry base removes the Hunter from existence:

In the end I had achieved 4 VP to Jay's 0 VP and completely tabled his force. While Jay was still learning to use his Grizzlies more effectively, he's also got some really bad luck, or I just have good luck. Either way it will add up for him and run out for me and the tables will be turned!

Sunday, December 12, 2010

Heavy Gear - The Battle for Canterbury Heights

Cpl. Frost skated his way through a copse of alpine firs, the secondary movement system's treads on his Tiger tearing up fresh turf. The inevitable had finally come to Terra Nova today, and CEF forces were beginning to drop surface-side. The clear mountain air was still stained with the smoke of destroyed drop pods, yet many more had made landfall. His squad, garrisoned in this major city in the foothills of the Dunning Range, were now on-route to validate reports of hovertanks in the suburb of Canterbury Heights to the northeast. Climbing another hill, his heads-up display lit up with hostile units in the vicinity. He quickly dodged a blast from a gatling laser canon and returned fired with his medium bazooka. War had indeed come to the United Mercantile Federation...

Well if that doesn't get you excited, nothing will! I got another opportunity to get a game in down at X Planet with fellow DP9 forumite Sumpbeast and his CEF with Caprician allies. I had never faced against any of the CEF's conquered allied units, so I was looking forward to seeing how they performed.

We both came with 800 TV forces. I ran a PL3 UMFA list that consisted of GP Squad with Tigers, Sabretooths, medium bazookas, tankhunter upgrades and buffed skills, a Recon Squad with 2 Bobcats and 2 Weasels, an upgraded Field Gun, and an Infantry Platoon with 2 rocket launchers and 2 field mortars. Sumpbeast ran a PL1 force with 4 LHT-67s, a GREL Infantry Platoon, 2 with field mortars and 2 with ATVs and rocket launchers, and a Caprician Patrol Squad that included his army commander.

We rolled for diagonal deployment, my forces set up below:

And Sumpbeast's deployment as well:

And here you can see both sides facing off against one another at the beginning of the game. For objectives, we each had 4 OP. Sumpbeast selected two Scout objectives, those being a copse of trees to the far right corner of the field, and a building in my deployment zone. Both can be picked out in the picture by the small purple D6s. He also picked to Seize the medical building my infantry were sitting on in my deployment zone. I had elected to Recon his Patrol Squad and Breakthrough to his deployment zone:

Sumpbeast and I elected to begin the game by trying to outflank each other in Turn 1, his HT-67 (all proxied with HT-71's) moving up my right while I moved my GP squad up my left.

My Recon Squad advanced towards his deployment zone while Active Detecting his Mounts, all while taking mortar fire from his GRELS.

CEF hostiles are light on my left flank while UMF forces advance into position.

My forces reach the main highway to try and take advantage of the benefits the smooth tarmac offers to ground movement.

Sumpbeast begins to apply additional pressure to my right flank by moving his forces away from the left. I engage Top Speed to take advantage and move towards his deployment zone.

A nice shot of the table mid-battle.

CEF and UMF forces trade fire up and down the main highway. The pilot of the Weasel will be up for promotion after this sortie, as he managed to place a grenade on the underside of an HT-67. That Earther has a long ride home in a pine box!

Another of Sumpeast's HT-67's begins to make it's way towards it's Seize objective.

The HT-67 is unstoppable. It took on rocket launcher and field mortar fire from my Infantry Platoon, and two shots from the Field Gun, and only suffered a sturdy box of damage to show for it!

Sumpbeast's ATV-riding GREL sweep in to Seize the medical building at the end of Turn 5 after eliminating my infantry inside.

UMF forces, having detected the entirety of the Patrol Squad, make a last ditch effort to eliminate all enemy forces in their deployment zone.

At the end of the game, Sumpbeast had a achieved an Overwhelming Success for his PL 1 side, gaining 4 out of 4 VPs, compared to my Disputed level for my PL 3 side, gaining 3 out of 4 VPs. In the end, it was a great game and I thoroughly enjoyed playing Sumpbeast. We both stayed focused on our objectives, while resisting the urge to just blow things up, just as a well-executed game of Heavy Gear should be!

Tuesday, November 23, 2010

Heavy Gear - Sleeping with the Enemy, Part 2.

I have a confession to make. I have a dirty little secret I want to tell you about. That skeleton in my closet is that I love the Naga. I know, I know, with all the posts on this blog dedicated to my Northern forces, you've gotta be thinking "how can you give those dirty Southern snakes some love?!?!"

But really, the Naga is a Northern unit in a round Southern striders's chassis. It's those ATMs really, which go against the Southern doctorine of rocking lasers at the expense of guided weapons. Plus I've always been a fan of Metal Gear Solid, and the Naga is Heavy Gear's Rex. See the Dark Naga to really get a feel for what I'm talking about, and the reason I need to play more PL4 games!

But since I already have a Long Fang version of the Naga, I thought it would be just as useful to have a vanilla version as well. One day I may be a double agent I suppose. Here's the result's of my painting:


When played well, Naga's can be the bane of the opposition player's existence. Hidden cleverly, you'll get bonuses of attacked from above and can't see your attacker levelled against you, and if the Naga goes stationary, the bonuses double. Just the thing to screw over your once carefully-plotted tactics!

Friday, November 19, 2010

Warhammer 40,000 - Teaching an Old Dog New Tricks

It's been a really long time since I've played any sort of 40K. I mean a really long time, somewhere in the range of 15 plus years ago. I think I mentioned in a post when I began this blog a year ago that 40K was what really got me into the hobby in the first place. Sure I've obviously gone on to other games and miniatures, and sure the rules are showing a bit of age when compared to some of the newer miniature rulesets coming out, but 40K is something I've always remembered playing fondly.

So when the owner of my FLGS (Lionel of X Planet in Mississauga, ON) asked me if I wanted to get in a game, I jumped at the chance. My Chaos Space Marines have set idle in my cabinet while I've worked on other things, and the chance to pit two armies of wonderfully coloured models against each other was too good to pass up.

I'm not a competitive 40K player (though that might change with the X Planet league that's starting in the new year), so the army I brought consisted of 1000 pts of models I've enjoyed painting: a pimped-out Tzeentch Chaos Sorcerer, an old Chaos Dreadnaught, a unit of 10 Chaos Marines with plasma guns, a unit of 9 Thousand Sons, and two 5-man Lesser Daemons units.

We rolled Capture and Control and Dawn of War for deployment. Here's a picture of how we intially deployed. Note the card boxes are our respective objectives.

My Thousand Sons were to play guard for my objective, their lack of mobility and terrifying inferno bolts being my main reason to have them stuck in (the handsome gentleman in the back for those that don't know, is Lionel, owner of X Planet here in Mississauga).

So I began the game with my Chaos Sorcerer firing his plasma pistol at the Rhino before charging in on the stationary vehicle to assault with krak grenades.

I'm pretty sure you can tell how my assult turned out from the next picture. Not only is the Rhino unharmed, but his combat squad jumped out to shoot, but 3 land speeders and another combat squad in Rhino showed up on the far flank to bloster his defences around his objective. After all was said and done n his shooting phase, he managed to take out my Chaos Sorcerer with a well-timed hit with a lascannon, causing Instant Death much to my chagrin.

I advanced my Chaos Marine sqaud through the cover of rubble, hoping to use it to block LoS. He countered this by bringing the fight to me via the "Rhino Wall." The war of attrition begins to go in Lionel's favour, as his Combat Squads disembark to riddle my forces with Rapid Fire from his boltguns.

My Lesser Daemons arrive out of the warp in Turn 2. Those to the left were to bolster the decimated remains of my Chaos Marines, while those on the right were to make a break for the objective under his control.

My Chaos Marine squad wittled down to the Aspiring Champion, both he and my Lesser Daemons make a last stand and Charge his Combat Squad. This was one of my few successes throughout the game.

Lionel's pesky landspeeders fly up my left flank. To add further insult to injury, he attacked my Chaos Dreadnaught with the trio's assualt cannons, causing a "vehicle immobilized" on the damage table when it was a mere 6" onto the table.

The Rhinos have now enaged my Thousand Sons, just outside of the picture to the bottom righthand corner. His Combat Squads are now left with the simple task of mopping up my Lesser Daemons.So after the blood and dust had settled, did the old dog learn any new tricks? Well, considering I pretty much was dead in the water by the end of Turn 3, I sure did. Here are my thoughts:

  1. New Dice: I managed to get about 3 penetrating hits on his vehicles in the first 2 turns of the game, but could never roll better than a 2. Add in his extra armour and it makes it even worse! I've been told that crushing one die in a vice in front of the rest makes a great example of what happens to under-performers!
  2. Bodies are Better: In smaller games like the one we were playing, more models on the table is more advantageous. My pimped out 235 point Chaos Sorcerer was taken out by a well placed lascannon shot from a Marine, a mere 20 point upgrade in comparison. That really hurt when 25% of my force was taken out in one shot!
  3. Brick City: The "Rhino Wall" was what really helped Lionel win the day. For 50 points he gets a basic transport with extra armour, that can block both my movement and LoS. "A 50 point piece of terrain" it was accurately called. The good thing is my traitor marines will be able to pull off the same move in the future, much to my opponent's frustration.

Until next time!