Monday, January 3, 2011

Heavy Gear - Incident at Checkpoint Ypsilon

Lt. Stone wiped the sweat from his brow before taking another gaze at the horizon with his binoculars. The hot rays of Helios hitting him were only slightly less uncomfortable than the stale air in his Sabretooth's cockpit, and the open canopy gave him a chance to smoke. What him and his men were really doing out here in WFP territory, where the Barrington Basin met the Great Western Plain, was anybodys guess. Word had simply come down from the brass that they were to advance on this small settlement, simply coded "Checkpoint Ypsilon" in the briefing to engage dissidents. Furthermore, the briefing had been delivered by a Northern Guard Intelligence Service officer, so it had to be something serious.

Stone's comm began chirping with information being downloaded, and he quickly scanned the information. "Dissidents" he found out, were CNCS units looking to desert and form their own fiefdom in the badlands, but not before destroying essential infrastructure on the way. While a UMF man himself, and his unit dedicated to the Northern Guard, he could not forgive their traitorous ways to Northern ideals. Something on the horizon caught his attention, and he quickly looked through his binoculars again. Dust trails, and Gears creating them on their way inbound. He quickly brought down the canopy and sealed the cockpit. "Alright boys, lets hit them where it hurts" he sent out to his troops on the general comm channel. He checked his autocannon's ammo clip one last time, and engaged his secondary movement system to intercept the hostiles...

So let's kick off 2011 with another battle report! In a rematch of sorts against regular opponent Jay, we've got some North on North action in a 700 TV point battle. My PL 2 NorGuard force consisted of a GP Squad with UMF Tiger and Sabretooth upgrades, an Infantry Platoon and a FS Squad. Jay also had a PL 2 force that consisted of 2 GP Squads and a FS Squad. My Objectives consisted of Breakthrough and Recon of one of his GP Squad. Jay's Objectives of Seize and Wipe Them Out on my GP Squad.

Here's a shot of both of our forces. Jay had chosen to spread his forces out along his battle line while I chose to make a heavy push up my left flank:

A closer look at my left flank. My goal was to overwhelm him on this side, and thus achieve my Breakthrough objective:

My Infantry Platoon and elements of my FS Squad stand guard on my right flank. One of my infantry squads bunkers in on Jay's Seize objective in the warehouse:

A "Gears Eye View" of what my GP Squad and Infantry are up against on the left flank:

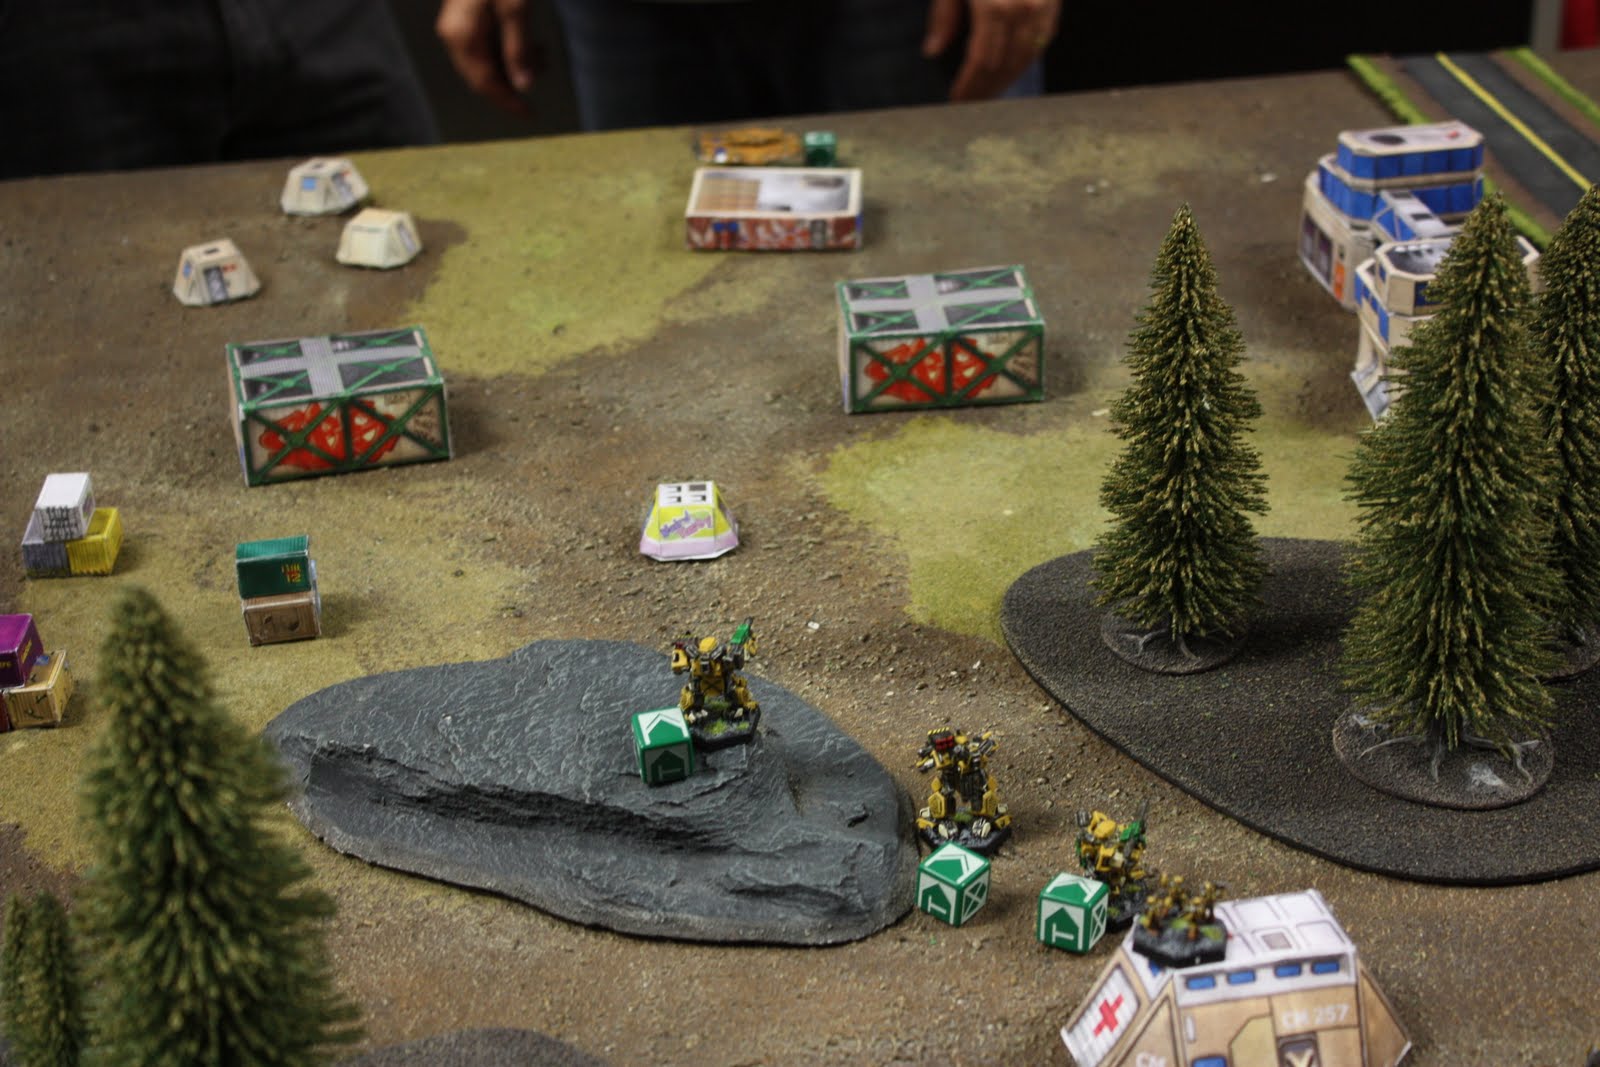
Elements of my GP Squad and FS Squad attack their opponents from atop a ridge (and my CP counter cowers behind a rocky outcropping):

My GP Squad begin mopping up the remainder of Jay's GP Squad and FS Squad:

A good shot of the fight mid-battle. Things are beginning to turn in my favour on the left flank, as Jay has few remaining units to stop me from achieving my Breakthrough objective:

Meanwhile, on the right flank, Jay has fresh Gears ready to Seize is objective, with little of my forces between the two:

My Infantry Platoon bunkers up in the buildings around Jay's Seize objective, while raining field mortars (much to their futility) on enemy units:

Jay brings reinforcement to my left flank, but they prove no match for my GP Squad:

Jay's last ditch effort on his objective results in the total destruction of his forces on my right flank:

A well-placed rocket from the remaining infantry base removes the Hunter from existence:

In the end I had achieved 4 VP to Jay's 0 VP and completely tabled his force. While Jay was still learning to use his Grizzlies more effectively, he's also got some really bad luck, or I just have good luck. Either way it will add up for him and run out for me and the tables will be turned!

Sunday, December 12, 2010

Heavy Gear - The Battle for Canterbury Heights

Cpl. Frost skated his way through a copse of alpine firs, the secondary movement system's treads on his Tiger tearing up fresh turf. The inevitable had finally come to Terra Nova today, and CEF forces were beginning to drop surface-side. The clear mountain air was still stained with the smoke of destroyed drop pods, yet many more had made landfall. His squad, garrisoned in this major city in the foothills of the Dunning Range, were now on-route to validate reports of hovertanks in the suburb of Canterbury Heights to the northeast. Climbing another hill, his heads-up display lit up with hostile units in the vicinity. He quickly dodged a blast from a gatling laser canon and returned fired with his medium bazooka. War had indeed come to the United Mercantile Federation...

Well if that doesn't get you excited, nothing will! I got another opportunity to get a game in down at X Planet with fellow DP9 forumite Sumpbeast and his CEF with Caprician allies. I had never faced against any of the CEF's conquered allied units, so I was looking forward to seeing how they performed.

We both came with 800 TV forces. I ran a PL3 UMFA list that consisted of GP Squad with Tigers, Sabretooths, medium bazookas, tankhunter upgrades and buffed skills, a Recon Squad with 2 Bobcats and 2 Weasels, an upgraded Field Gun, and an Infantry Platoon with 2 rocket launchers and 2 field mortars. Sumpbeast ran a PL1 force with 4 LHT-67s, a GREL Infantry Platoon, 2 with field mortars and 2 with ATVs and rocket launchers, and a Caprician Patrol Squad that included his army commander.

We rolled for diagonal deployment, my forces set up below:

And Sumpbeast's deployment as well:

And here you can see both sides facing off against one another at the beginning of the game. For objectives, we each had 4 OP. Sumpbeast selected two Scout objectives, those being a copse of trees to the far right corner of the field, and a building in my deployment zone. Both can be picked out in the picture by the small purple D6s. He also picked to Seize the medical building my infantry were sitting on in my deployment zone. I had elected to Recon his Patrol Squad and Breakthrough to his deployment zone:

Sumpbeast and I elected to begin the game by trying to outflank each other in Turn 1, his HT-67 (all proxied with HT-71's) moving up my right while I moved my GP squad up my left.

My Recon Squad advanced towards his deployment zone while Active Detecting his Mounts, all while taking mortar fire from his GRELS.

CEF hostiles are light on my left flank while UMF forces advance into position.

My forces reach the main highway to try and take advantage of the benefits the smooth tarmac offers to ground movement.

Sumpbeast begins to apply additional pressure to my right flank by moving his forces away from the left. I engage Top Speed to take advantage and move towards his deployment zone.

A nice shot of the table mid-battle.

CEF and UMF forces trade fire up and down the main highway. The pilot of the Weasel will be up for promotion after this sortie, as he managed to place a grenade on the underside of an HT-67. That Earther has a long ride home in a pine box!

Another of Sumpeast's HT-67's begins to make it's way towards it's Seize objective.

The HT-67 is unstoppable. It took on rocket launcher and field mortar fire from my Infantry Platoon, and two shots from the Field Gun, and only suffered a sturdy box of damage to show for it!

Sumpbeast's ATV-riding GREL sweep in to Seize the medical building at the end of Turn 5 after eliminating my infantry inside.

UMF forces, having detected the entirety of the Patrol Squad, make a last ditch effort to eliminate all enemy forces in their deployment zone.

At the end of the game, Sumpbeast had a achieved an Overwhelming Success for his PL 1 side, gaining 4 out of 4 VPs, compared to my Disputed level for my PL 3 side, gaining 3 out of 4 VPs. In the end, it was a great game and I thoroughly enjoyed playing Sumpbeast. We both stayed focused on our objectives, while resisting the urge to just blow things up, just as a well-executed game of Heavy Gear should be!

Tuesday, November 23, 2010

Heavy Gear - Sleeping with the Enemy, Part 2.

I have a confession to make. I have a dirty little secret I want to tell you about. That skeleton in my closet is that I love the Naga. I know, I know, with all the posts on this blog dedicated to my Northern forces, you've gotta be thinking "how can you give those dirty Southern snakes some love?!?!"

But really, the Naga is a Northern unit in a round Southern striders's chassis. It's those ATMs really, which go against the Southern doctorine of rocking lasers at the expense of guided weapons. Plus I've always been a fan of Metal Gear Solid, and the Naga is Heavy Gear's Rex. See the Dark Naga to really get a feel for what I'm talking about, and the reason I need to play more PL4 games!

But since I already have a Long Fang version of the Naga, I thought it would be just as useful to have a vanilla version as well. One day I may be a double agent I suppose. Here's the result's of my painting:


When played well, Naga's can be the bane of the opposition player's existence. Hidden cleverly, you'll get bonuses of attacked from above and can't see your attacker levelled against you, and if the Naga goes stationary, the bonuses double. Just the thing to screw over your once carefully-plotted tactics!

Friday, November 19, 2010

Warhammer 40,000 - Teaching an Old Dog New Tricks

It's been a really long time since I've played any sort of 40K. I mean a really long time, somewhere in the range of 15 plus years ago. I think I mentioned in a post when I began this blog a year ago that 40K was what really got me into the hobby in the first place. Sure I've obviously gone on to other games and miniatures, and sure the rules are showing a bit of age when compared to some of the newer miniature rulesets coming out, but 40K is something I've always remembered playing fondly.

So when the owner of my FLGS (Lionel of X Planet in Mississauga, ON) asked me if I wanted to get in a game, I jumped at the chance. My Chaos Space Marines have set idle in my cabinet while I've worked on other things, and the chance to pit two armies of wonderfully coloured models against each other was too good to pass up.

I'm not a competitive 40K player (though that might change with the X Planet league that's starting in the new year), so the army I brought consisted of 1000 pts of models I've enjoyed painting: a pimped-out Tzeentch Chaos Sorcerer, an old Chaos Dreadnaught, a unit of 10 Chaos Marines with plasma guns, a unit of 9 Thousand Sons, and two 5-man Lesser Daemons units.

We rolled Capture and Control and Dawn of War for deployment. Here's a picture of how we intially deployed. Note the card boxes are our respective objectives.

My Thousand Sons were to play guard for my objective, their lack of mobility and terrifying inferno bolts being my main reason to have them stuck in (the handsome gentleman in the back for those that don't know, is Lionel, owner of X Planet here in Mississauga).

So I began the game with my Chaos Sorcerer firing his plasma pistol at the Rhino before charging in on the stationary vehicle to assault with krak grenades.

I'm pretty sure you can tell how my assult turned out from the next picture. Not only is the Rhino unharmed, but his combat squad jumped out to shoot, but 3 land speeders and another combat squad in Rhino showed up on the far flank to bloster his defences around his objective. After all was said and done n his shooting phase, he managed to take out my Chaos Sorcerer with a well-timed hit with a lascannon, causing Instant Death much to my chagrin.

I advanced my Chaos Marine sqaud through the cover of rubble, hoping to use it to block LoS. He countered this by bringing the fight to me via the "Rhino Wall." The war of attrition begins to go in Lionel's favour, as his Combat Squads disembark to riddle my forces with Rapid Fire from his boltguns.

My Lesser Daemons arrive out of the warp in Turn 2. Those to the left were to bolster the decimated remains of my Chaos Marines, while those on the right were to make a break for the objective under his control.

My Chaos Marine squad wittled down to the Aspiring Champion, both he and my Lesser Daemons make a last stand and Charge his Combat Squad. This was one of my few successes throughout the game.

Lionel's pesky landspeeders fly up my left flank. To add further insult to injury, he attacked my Chaos Dreadnaught with the trio's assualt cannons, causing a "vehicle immobilized" on the damage table when it was a mere 6" onto the table.

The Rhinos have now enaged my Thousand Sons, just outside of the picture to the bottom righthand corner. His Combat Squads are now left with the simple task of mopping up my Lesser Daemons.So after the blood and dust had settled, did the old dog learn any new tricks? Well, considering I pretty much was dead in the water by the end of Turn 3, I sure did. Here are my thoughts:

  1. New Dice: I managed to get about 3 penetrating hits on his vehicles in the first 2 turns of the game, but could never roll better than a 2. Add in his extra armour and it makes it even worse! I've been told that crushing one die in a vice in front of the rest makes a great example of what happens to under-performers!
  2. Bodies are Better: In smaller games like the one we were playing, more models on the table is more advantageous. My pimped out 235 point Chaos Sorcerer was taken out by a well placed lascannon shot from a Marine, a mere 20 point upgrade in comparison. That really hurt when 25% of my force was taken out in one shot!
  3. Brick City: The "Rhino Wall" was what really helped Lionel win the day. For 50 points he gets a basic transport with extra armour, that can block both my movement and LoS. "A 50 point piece of terrain" it was accurately called. The good thing is my traitor marines will be able to pull off the same move in the future, much to my opponent's frustration.

Until next time!

Tuesday, November 2, 2010

Warhammer 40,000 - Pink Whores

"What did you just call them!?!?"

That was my reaction to when my wife heard me say "I'm painting some Pink Horrors." When it comes to the hobby, the spouses of gamers will say the funniest things when interpreting whatever it is you're talking about. The best part is though, is that the title has stuck, much like the term "nerd store" and now I refer to them using the same title as well. So, without further rambings, I present to you my other 5 pink whores, to complete my box of the old versions of these lesser daemons:


And off to the next project on my hobby desk!

Friday, October 22, 2010

Heavy Gear - First Fight in a While!


So it's been a while but I finally managed to get a game of Heavy Gear Blitz in! Against gaming buddy and new opponent Jay, we battled it out in a North versus North slugfest to see who would be more devoted to the Prophet!

At our FLGS (X Planet in Mississauga, ON. One of the best shops around and the owner, Lionel, is a real stand-up guy!) we squared off with our opposing 700 TV forces. My force was a PL 3 UMFA group consisting of a GP squad with plenty of upgrades (skills upped, dedicated tankhunter snub cannons and Tiger/Sabretooth Gear upgrades), a Recon squad with 2 Bobcats and 2 Weasels, and a Field Gun Section with 2 Field guns and maxed attack skills. I hadn't used this combination of units before, and my thoughts before the game were it would definitely play to a "search and destroy" angle, my scout gears using their superior Sensor ratings to Detect enemies for the Field Guns to lay into. Jay had a generic North PL2 army with 2 GP squads (both with vanilla snubcannons), an infantry platoon and a Strider attachment consisting of a Mammoth that housed his army commander.

Here's a picture of how things were initially set up. Jay attacked from left to right and I right to left. With 700 TV forces we just had 2 OP to select missions from. We both chose Hold, Jay holding the large two-building complex and myself holding the small building my Gears are clustered around on the far edge of the table.

Here we have my Gears holding my objective. My Hunters trade shots with Jay's while the Bobcat FO's for the Field Guns.

Jay advances his Mammoth to take on my Sabretooth in a duel of Army Commanders. My AC must've been personally blessed by the Prophet himself before the battle, as he manged to to dodge 3 ATMs without taking any damage!

Jay referred to this duel as the "Mexican Standoff." While his SC-toting Hunter managed to take mine out, I didn't go without a fight, spending a CP to a parting shot and take him with me to my grave!

The beginning of the end for Jay's night. His AC killed, and his "hold" objective firmly in my control now thanks to some APGL shots from my Jaguar into his infantry that had gone Hull Down in his building, I begin to tighten my stranglehold on his remaining forces.

In the end I had managed to take 2 VP to his 0 VP. We both had a great time and vowed for another rematch. Jay has just begun to play HGB with some regularity, and has new units in the mail, so I'm looking foward to it! Some initial thoughts on the battle:

  1. Two Field Guns are Better than One: In the past I've played with just one, but having two seems much better, especially at the beginning of the game. On my right flank Jay had set up both his GP squads, and I had two Hunters and Bobcat (which I didn't plan to us to) defend my objective. These really "thinned the rank" so that he was only able to bring 3 Hunters at me in the end!
  2. Scout Gears can Skate: The Bobcat on my right flank can really dodge the heat, and was able to stick around long enough to FO many well placed shots from the Field Guns. The +2 DEF modifier at secondary combat speed really helped! I don't think I'll leave home without taking these little guys in the future.

Until the next battle...or whatever I finish painting!

Tuesday, September 28, 2010

Terrain - Follow the Miniature Road (A Tutorial)

Well, in the midst of finishing up my Pink Horrors, I've been sidetracked by the purchase of a PS3 and a terrain building project, a set of 12-15mm road pieces. Most 15mm scale terrain is dominated by World War II-era pieces due to the popularity of Flames of War. While those companies that cater to that market do an excellent job of building terrain, being a Heavy Gear Blitz player means my 15-ft tall war machines look a tiny bit out of place marching up and down dirt roads past European cottages.

So here is my attempt at building a credible set of 15mm modern and paved road pieces. Here's the materials are started off with:
  • Polystyrene Lighting Panel (similar to what you'd find in your office space as a cover for florescent lighting);
  • Tube of "No More Nails" (found in the adhesive section of Home Depot);
  • Bag of Sand (found really cheap at Michaels)
  • Can of Spray Stone Finish (Alabaster for a really fine finish
  • Can of Primer
  • Masking Tape
  • Variety of Black, Grey, Brown and Yellow Paints (I use the cheap craft paint available at Wal-Mart for $2.00 a jar)
  • Mixed Green Flock
  • Static Grass
So, with the above grocery list of simply hobby materials, here's how I put my roads together.
  1. Using a pair of shears, cut very slowly (the slower the better, I learned the hard way that if you cut fast you split and chip the panel) a 4" by 12" rectangle out of the polystyrene.
  2. Using your masking tape, block off the inner 2" of the length of the rectangle (at the 15mm scale, 1" is roughly 1 lane on a road).
  3. Using the tube of No More Nails, lay down a layer of the adhesive on the outer two bands not covered and heavily cover with sand, pressing down tightly on it make sure it has a strong bond.
  4. About 10 minutes after putting the sand down, quickly rip up the masking tape, leaving a bare strip of panelling and leave to dry
  5. Once dry, spray with primer, and leave to dry.
  6. After the primer is dry, lay down a fine spray of spray stone finish along the inner band and prime again.
  7. Paint the whole piece black, and layer the sandy outer bands with brown, and the inner band with dark grey, and finish with a single line of yellow down the middle of the band to determine the two lanes on the road.
  8. Coat the brown sandy edges with flock, leaving a little bit of a shoulder, and put some static grass down on the very outer edges.

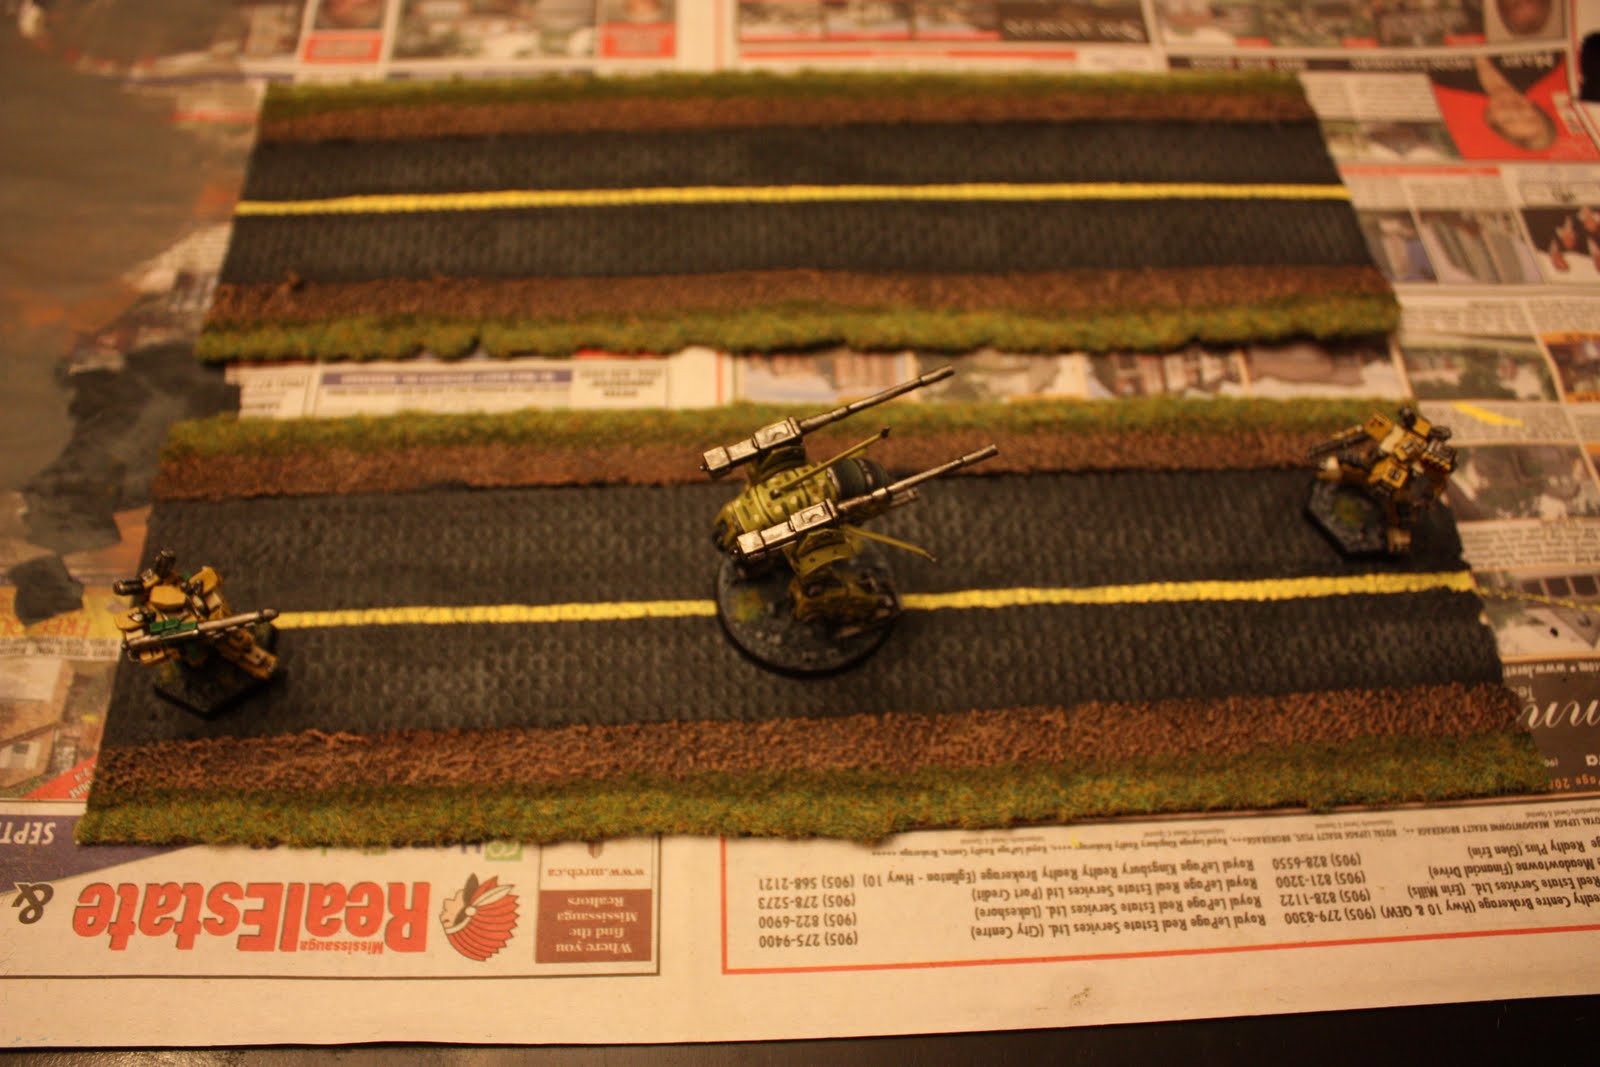
And here's a couple pictures of the finished product: