Showing posts with label Battle Report. Show all posts

Thursday, May 26, 2011

Heavy Gear - CanGames Battles 3 & 4

My third draw brought me up against DP9 forumite John Prins. For those that have followed my blog you'll know this would be a rematch of sorts, John bringing his Mekong Peacekeeper force up against my Northern Guard. Both of us however, had brought some new friends. John had retained the Paratroop Cadre and Fire Support Cadre, but also brought along a kitted out MP Cadre that included a Cobra MP and a Black Adder. I was really looking forward to this game, as John has got be the best opponent I've ever faced in Blitz. Playing him you can just see that no Action or Movement is wasted, and that everything he does in the game is really in anticipation of what will happen in the next round or two. There were three objectives on the table, and I was tasked with Forward Observing them all in order to identify which one had the civilians stand I was supposed to rescue and Hold until the end of the game. Lucky for me, I brought a Weasel along, and I could already start the FO from my own deployment zone under cover. Even luckier for me, I FOed the correct objective by round 2 and popped the civilian token into play. After that things became fast and furious; my Recon Squad's Jaguar sped in to pick them up, while elements of his Paratroop Cadre laid down some serious hurt with both their light bazookas and denying my use of CPs through their wily use of EW. I tried to smash them off the face of the planet, but even after a Field Gun attack and two Medium Artillery Strikes, they weathered the storm well and took minimal damage. In the John was in control of the civilian stand, with no units of my anywhere close to contest it, and he won 3-2 VPs. Here are a few pictures of the battle.


John pops smoke to cover the advance of his Paratroop Cadre towards an Objective.


Under the cover of a pile of scrap, my Weasel FOs the objective while friendly units advance upon it.


On the otherside of the battlefield, John moves elements of his Fire Support Cadre deftly though the scrap piles.


Northern forces have taken the objective, but heavily armed Southern units are on the prowl.


The civilian stand has been taken, and my Jaguar does it's best to take on the fire from its Southern advisaries.


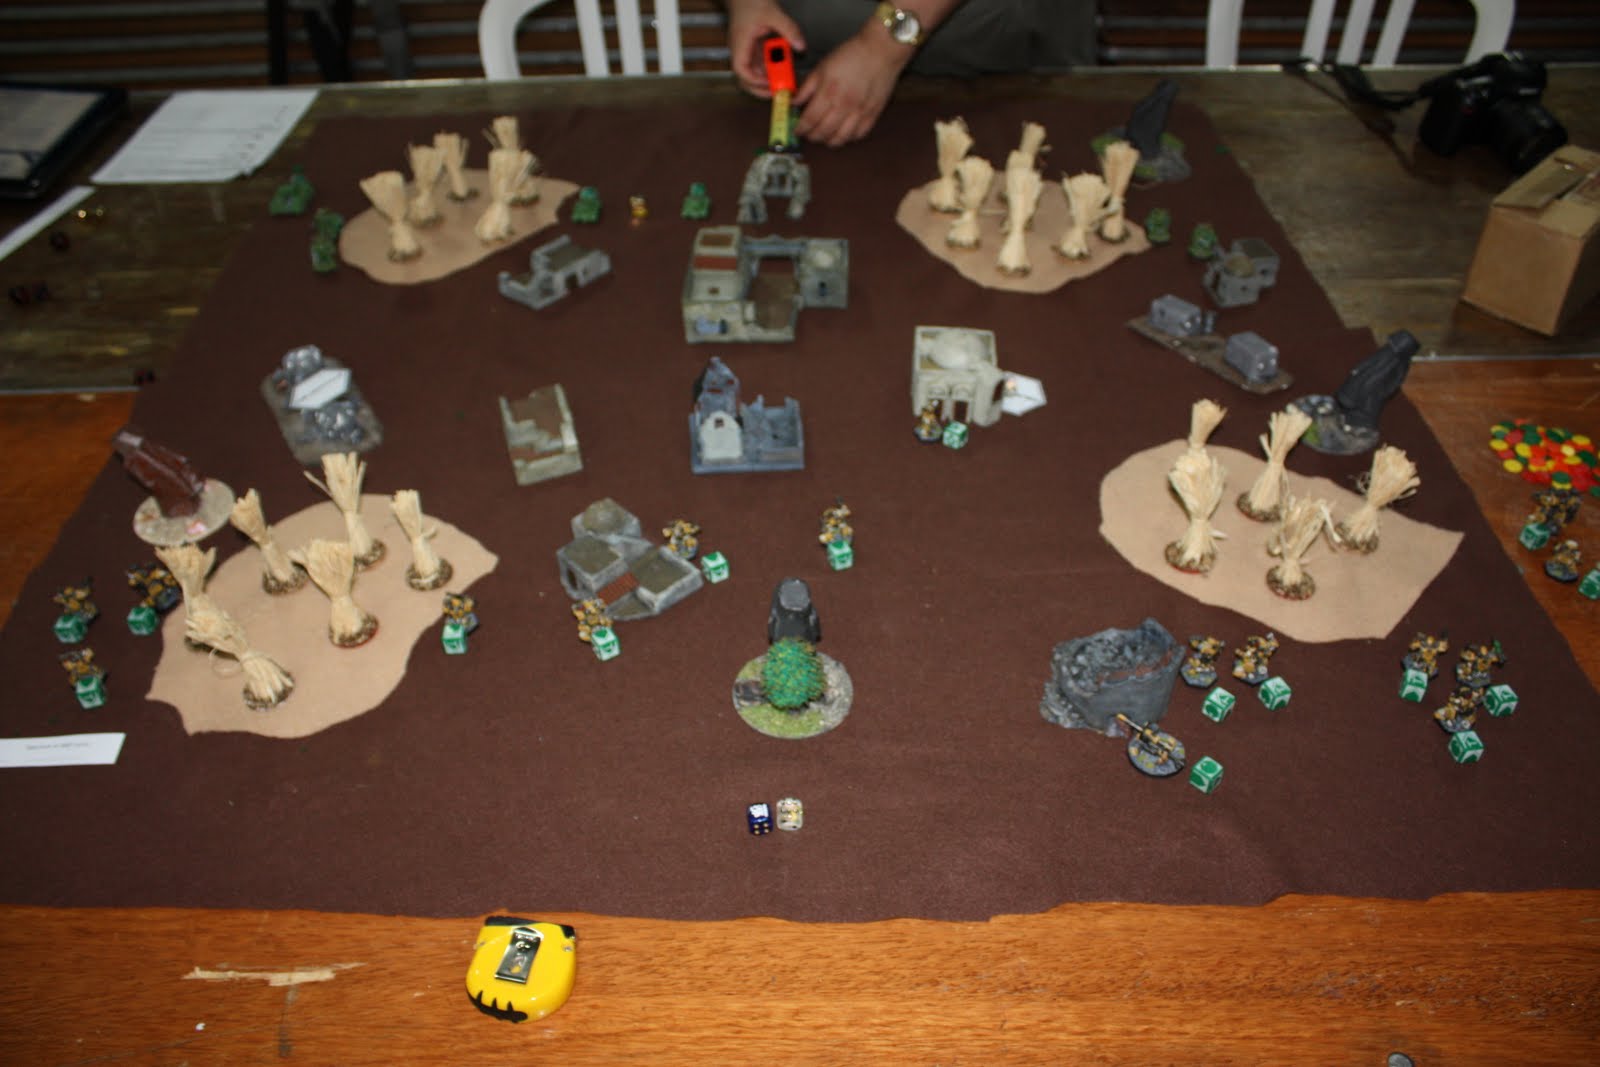
My fourth and final draw had me up against DP9 forumite Hapotte. Hapotte had stepped in for his father Jean who had to leave and fielded a Northern force of: a Light Tank Squad with 2 Bandit Hunter Klemms; a Field Gun Section with two field guns; a Dragoon Squad, and; a Strike Squad. Both of us had the same Objectives: two Wipe Them Out orders to be randomly determined on our units. I knew I had to be aggressive to keep myself in the game. My first Field Gun shot took out one of his Field Guns and knocked a Sturdy Box of a Hunter. He also had his Rabid Grizzly go stationary to attack my quickly advancing White Cat (which took so much fire without a real scratch and should get Gear of the Match honours), a mistake I quickly capitalized on and had my Grizzlies take it out with HGM fire. My Artillery Strikes really paid off as well in this game as I rolled boxcars for my raw roll, and it took out both his Kodiak and a Cheetah. All of that happened in the first turn, quickly swinging the game in my favour. In the end I ran out the victor 4-0 VPs, and only lost a single Gear in the process. Here's a couple of pictures I took of the last round in action.


I quickly begin apply pressure to my left flank, with elements of my GP Squad holding a building, while the rest of their squadmates advance.


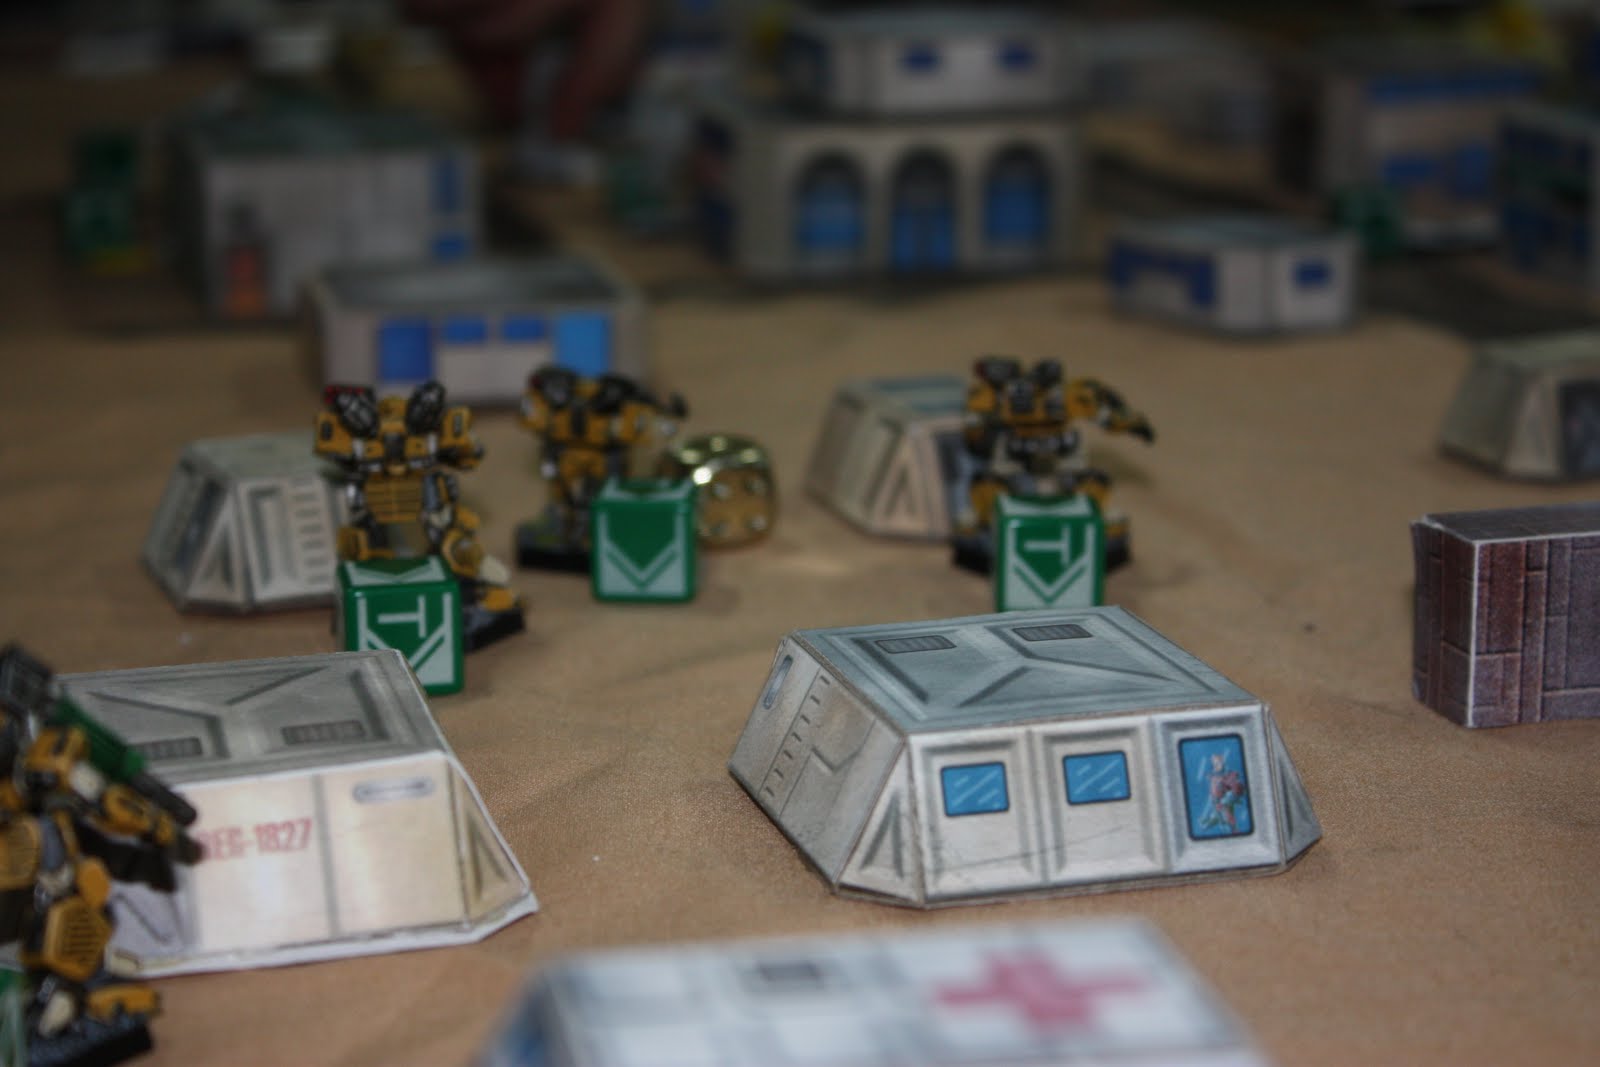
On my right flank, my Grizzly takes cover behind a structure to rain mortar fire over the battlefield, while a Hunter stands guard to the left.


My forces on the left flank take fire while advancing.


My White Cat leads the charge on the left flank, while Hapotte focus' his fire upon it.


The bulk of my forces have now all moved forward, with the exception of those units that IF capabilities.


The beginning of the end for Hapotte, as I consilodate my forces and begin mopping up the remainder of his units.


In the end I ended up with 4 tournament points, which were not close enough to eventual tournament champ Izzy's 7, and could not defend my 2010 title. Congratulations to everyone that participated and I must say that playing with everyone here is always one of the highlights of the year. Can't wait to do it all again next spring!

Wednesday, May 25, 2011

Heavy Gear - CanGames Battles 1 & 2

My first draw was against DP9 Forumite CADMonkey. He had a Southern force that consisted of: his Army Commander in a standard Naga; a Recon Cadre, and; at Tank Cadre with 2 Huns and a Visigoth; not a lot of models, but a very elite force. My objectives were to kill his army commander and scout the associated objectives on the table. Pretty standard fare, except for the playing conditions that had been thrown in: in this round, all tables were considered to be under darkness and had an EM storm going on at the same time. This meant that the enemy was both harder to Detect and every time a Comm Event was initiated, you had to beat the storm to achieve it. I had never faced off against Southern armour before this game, and what I learned from the battle is that they are points well spent. His Visigoth started off the game by getting a Combat Lock on my Weasel on his first activation, and promptly wiped him off the face of Terra Nova! Rounds of Medium Artillery Strikes were also no deterrent for them either, barely taking off the Sturdy Boxes off the Huns. After the dust had settled I lost my first match of the Tournament by the narrow margin of 2-1 VP in CADMonkey's favour. Here are some pics I took in my battle against him:

Elements of my Recon Squad Advance while CADMonkey's Huns ready their fire.


A full shot showing both CADMonkey's and my forces:.


My White Cat hides behind a building while Forward Observing one of two Objectives on the table, while my Bobcat tries to draw a bead on CADMonkey's Naga.


My Fire Support presses forward to both Forward Observe an Objective while attempting to take the battle to CADMonkey's Visigoth.


CADMonkey's Huns take the fight to me, and attempt to take out my my remaining recon Gears.


My second draw was against DP9 Forumite Robock. He brought a Badlander force that consisted of: an Infantry Platoon, half being in ORVs; a Sniper Squad with a well placed Recon Drone; a unit of Northern Gears that included Assault Jaguars, and; a unit of Southern Gears, all equipped with Light Bazookas. My objectives were to make sure my Army Commander and his squad remained alive and hold the assigned objectives on the table. Luckily there were no table effects for this round. Things started off much better for me this draw: my Field Gun landed a sweet shot the first round, Overkilling one of his Assault Cheetahs and damaging a Jager. My Bobcats and other Recon Gears quickly swept forward to trade shots and destroy elements of his Recon Platoon. The rest of my force either huddled near the objective to keep it safely in my control, or flanked Robock's forces to get some shots in with their medium bazookas. As time ran out, I was now all square, winning this round 4-0 VPs in my favour. Here's some pictures I took from my second match:

Here is the battlefield from my perspective during mid deployment.


My Fire Support Squad takes cover and hunkers down to hold the objective.


My force keeps cover between them and Robock's forces and takes fire, but shrugs off the damage.


My Recon Squad advances along my left flank and engages elements of Robock's Gear squads.


My Bobcat fires on Robocks infantry squads while his Gears adavance behind the cover of buildings.


My Recon Squad are about to be bombarded by and Medium Artillery Strike.


Friday, March 18, 2011

Heavy Gear - Rumble in the Jungle

Lt. Kovacs surveyed his immediate area via virtual reality provided by his HUD. The wetlands and jungle vegetation of the Mekong played out in bright green, contrasting with the friendly blues points that denoted his unit's Gears. Suddenly a large insectoid the size of a Thunderhammer smashed through his units and the jungle, scrambling everything in his VR suite. "Environmentally sealed my ass," he muttered as he tore off his helmet to swat the now tiny bug that that infiltrated the cockpit.

Command had been tracking a small force of Dominion troops ever since they led an assault on a Northern-controlled research facility in the Badlands. The Mekong government denied any involvement, but you could never trust a Southerner, no matter the League they came from. His force had set up camp for the night along a sparcely settled road, and hunkered down for the inevitable assault the Dominionite forces would try for through the evening. Kovacs listened to the swaying of the long grass and tree limbs in the dark. Any other time it would be peaceful, but now it hung over them like a cloak to hide the approach of Southern Gears.

Fellow DP9 forumite John Prins and I got together for a 1000 TV battle this weekend down at X Planet. I was anticipating not only a great fight, but a wonderful battle report as well, since John has one of the nicest painted Southern forces around. He brought a PL3 Mekong force that consisted of 2 Paratroop Cadres and a Fire Support Cadre. His Paratroop Cadres had all the bells and whistles, with buffed skills, a Long Fang Black Mamba and Iguana Paratroopers with LBZKs. I brought a PL3 UMF force with a GP Squad, a Recon Squad, a FS Squad and an Infantry Platoon. Just the GP Squad had buffed skills, and half the Infantry Platoon came with ORVs and AGMs.

At 1000 TV you have 6 OP. I rolled for Defensive Objectives and elected to Blockade my deployment zone, have my FS Squad leader Survive, and Recon John Prins's FS Cadre. John's Objectives were to Breakthrough to my deployment zone, Seize the building with the elevated walkway, and Wipe Out my Recod Squad.

Here's a shot of my deployment zone, with all my models at the start:

John elected to keep his two Paratroop Cadres off the board, and started with his FS Cadre as the lone combat group on the board:

My ORVs press up the right flank to engage John's Python and Stripped-Down Hunter (with Snipered HAC):

On the opposite flank, my Antelope take advantage of the road to engage another Stripped-Down Hunter and Support Cobra:

The greater bulk of my forces wait for the arrival of John's Paratroop Cadres and their assault on my deployment zone:

By the end of Turn 2, John's FS Cadre had been heavily damaged, in part to the sacrifice of my ORVs and their AGMs:

At the end of Turn 2, John brings in one of his Paratroop Cadres on my left flank:

Behind the safety of cover, John drops his other Paratroop Cadre on my right flank. A lone Bobcat stands in their way:

My Bobcat is still in the fight after 10+ attack attempts on him. Meanwhile, elements of my GP Squad, FS Squad and Infantry Platoon stand ready to repel his charge over the hill:

Throughout Turn 4, a strong yellow line of Northern Forces still stands ready to defend their deployment zone:

It's Turn 5, and John pops smoke to protect his Gears from further attack while they hold their Seize objective:

When the dust had settled, I had acheived 4 VP to John's 2. My thoughts on this battle were that I won more by accident than well-planned tactics. I wasn't familiar with the Airdroppable rules, but the high model count, the push forward by a few scout Gears, and the inclusion of 2 Weasels in my Recon Squad meant that he had to drop his Gears in well back from my deployment zone. I also totally forgot to use the Artillery Strikes I bought with my SPs. The really could've come in handy to try and take out his Paratroop Cadres who made great use of cover. John is a great opponent, and I look forward to our next game. He supposed to be at CanGames as well, and I hope we can get some practice in to make the GTA proud at the Canadian Championship come May!

Saturday, February 26, 2011

Heavy Gear - Training Sortie Delta

Sgt. Jackson eased his Jaguar out of the Orca's bay and onto to the solid ground of the Zagreb Plains. The rest of his recon squad deployed and braced themselves as the aerial transport lifted off, causing strong gusts of wind that rattled the internals of their Gears and flattened the grass all around them. Jackson ordered his squad to check their equipment one last time before heading further west on their mission.

Central Command had learned that the Colonial Earth Forces had returned with greater intelligence. Word had been that they now employed commando tactics including the use of the North's own weapons and tactics against them. What better way to train than to having the North train against themselves the brass had decreed. "I think it's such a stupid idea" Jackson muttered to himself. The one silver lining to this training is that he had served under the Commanding Officer of the opposing force before, and while they were using non-lethal ammunition, he wouldn't think twice of getting up close and socking the commander with a nice left hook from his gear. "Brothers-in-arms will be brothers-in-arms," he joked to himself before throttling up his secondary movement system to engage his opponents.

Regular opponent Jay and I had another 750 TV battle over the weekend. Now the lead-up to this was that Jay was to bring his newly minted Peace River army, but regular life unfortunately got in the way. He tells me he's on the road for the next few weeks, so many hours spent in hotels should result in that finished army he (and I) eagerly want to play. Instead he brought his Northern army for what result in some incestuous carnage. As well, this was also our first time playing with the new Gear Up field testing rules as well.

Jay's Northern Guard force consisted of a General Purpose (GP) Squad, a Fire Support (FS) Squad, and an Infantry Platoon. My UMFA force consisted of a GP Squad with the Tigers and Sabretooths, a Recon Squad with a Weasel, SD Hunter and two Bobcats, an Infantry Platoon, one section being in freshly painted Antelope ORVs, and a single Field Gun. My objectives were to Recon his GP Squad and Breakthrough to his deployment zone; Jay's objectives were to Recon my Recon Squad and Wipe Them Out for my GP Squad. Here's a good shot of our forces set-up.

Elements of my GP Squad and a squad of Infantry in ORVs begin to move down Jay's left flank.

Another shot of my army from the opposite side of the board.

My forces on the right flank advance on Jay's GP Squad. Just out of the picture at the end of the road sits my ORV squad, who went top speed to contest my Breakthrough objective in my first activation of the first turn of the game!

On my left flank, My Recon Squad calls in targets for my Field Gun to rain fire down upon while my other squad of ORVs harrasses elements of Jay's FS Squad.

Elements of my GP Squad hold a choke point between two buildings after dipsatching Jay's Army Commander. Unfazed by this loss, Jay's troops continue to attempt to obtain their Wipe Them Out objective on my GP Squad.

My GP Squad holding down the buildings from the opposite vantage point.

On my left flank, the majority of Jay's forces have been overcome, and I press forward to complete my Breakthrough objective with elements of my Recon Squad.

On the right flank, a single Hunter is all the remains of Jay's forces; my Breakthrough objective will soon be in my grasp.

Jay's Gears are totally overcome, leaving his infantry ti be the only opposition left. They did manage to pling a box of damage on one of my SD Hunters though with basic assault rifles!

So after all was said and done Jay had achieved 2 VP to my 3 VP. Not a bad result at all for Jay considering he was Gearless by the end of the game. Besides that here's a couple of observations I had:

  1. Flies in the Ointment: I was more than impressed with a section of Infantry in ORVs. None of them managed to finish the game alive, however, their rapid speed (especially on roads) combined with the Anti-Gear rocket launchers they were equipped with meant they a threat Jay could not ignore. Since I had them contest an Objective early in the game, Jay tied his Grizzlies up with fighting them, meaning I did not have to deal with MRP barrages on my Gears instead.

  2. Everything Old is New: After playing with the new GearUp rules, I don't think I'll go back to the old set. The range bands are awesome, making such basic weapons as Light Autocannons and Anti-Gear Rifles viable once again. The new Maneuver rules means that I actually use Gears in walker modes, and the new overkill rules means Hunters become the steady workhorses they are supposed to be. My favourite part of using the new rules was when I was able to have a Hunter go Stationary and use it's ROF on it's LAC to walk fire between two enemy Hunters, dropping one to Heavy Damage and Overkilling another, all from 12" away!

Monday, January 3, 2011

Heavy Gear - Incident at Checkpoint Ypsilon

Lt. Stone wiped the sweat from his brow before taking another gaze at the horizon with his binoculars. The hot rays of Helios hitting him were only slightly less uncomfortable than the stale air in his Sabretooth's cockpit, and the open canopy gave him a chance to smoke. What him and his men were really doing out here in WFP territory, where the Barrington Basin met the Great Western Plain, was anybodys guess. Word had simply come down from the brass that they were to advance on this small settlement, simply coded "Checkpoint Ypsilon" in the briefing to engage dissidents. Furthermore, the briefing had been delivered by a Northern Guard Intelligence Service officer, so it had to be something serious.

Stone's comm began chirping with information being downloaded, and he quickly scanned the information. "Dissidents" he found out, were CNCS units looking to desert and form their own fiefdom in the badlands, but not before destroying essential infrastructure on the way. While a UMF man himself, and his unit dedicated to the Northern Guard, he could not forgive their traitorous ways to Northern ideals. Something on the horizon caught his attention, and he quickly looked through his binoculars again. Dust trails, and Gears creating them on their way inbound. He quickly brought down the canopy and sealed the cockpit. "Alright boys, lets hit them where it hurts" he sent out to his troops on the general comm channel. He checked his autocannon's ammo clip one last time, and engaged his secondary movement system to intercept the hostiles...

So let's kick off 2011 with another battle report! In a rematch of sorts against regular opponent Jay, we've got some North on North action in a 700 TV point battle. My PL 2 NorGuard force consisted of a GP Squad with UMF Tiger and Sabretooth upgrades, an Infantry Platoon and a FS Squad. Jay also had a PL 2 force that consisted of 2 GP Squads and a FS Squad. My Objectives consisted of Breakthrough and Recon of one of his GP Squad. Jay's Objectives of Seize and Wipe Them Out on my GP Squad.

Here's a shot of both of our forces. Jay had chosen to spread his forces out along his battle line while I chose to make a heavy push up my left flank:

A closer look at my left flank. My goal was to overwhelm him on this side, and thus achieve my Breakthrough objective:

My Infantry Platoon and elements of my FS Squad stand guard on my right flank. One of my infantry squads bunkers in on Jay's Seize objective in the warehouse:

A "Gears Eye View" of what my GP Squad and Infantry are up against on the left flank:

Elements of my GP Squad and FS Squad attack their opponents from atop a ridge (and my CP counter cowers behind a rocky outcropping):

My GP Squad begin mopping up the remainder of Jay's GP Squad and FS Squad:

A good shot of the fight mid-battle. Things are beginning to turn in my favour on the left flank, as Jay has few remaining units to stop me from achieving my Breakthrough objective:

Meanwhile, on the right flank, Jay has fresh Gears ready to Seize is objective, with little of my forces between the two:

My Infantry Platoon bunkers up in the buildings around Jay's Seize objective, while raining field mortars (much to their futility) on enemy units:

Jay brings reinforcement to my left flank, but they prove no match for my GP Squad:

Jay's last ditch effort on his objective results in the total destruction of his forces on my right flank:

A well-placed rocket from the remaining infantry base removes the Hunter from existence:

In the end I had achieved 4 VP to Jay's 0 VP and completely tabled his force. While Jay was still learning to use his Grizzlies more effectively, he's also got some really bad luck, or I just have good luck. Either way it will add up for him and run out for me and the tables will be turned!